Projects.
These are projects that I've built for people or projects I've done for myself. When building a prototype I prefer to use hole mounted components because it's much easier to troubleshoot and modify than SMD components. It's always possible to use SMD components if needed.
2013-12-09 Paintball marker
Since it's not possible to do martial arts for me any more due to different knee injuries i needed to find a new hobby. It became paintball.
I own a marker which is of semi pro quality. Often when i play i want to know if i have few bullits left.
So i built a small levelsensor consisting of a LDO TPS77025 from TI which has 2.5V output, and a Pic12F675 (of course). The circuit is powered by a CR2032 battery. The way of detecting few balls is easy. I use a phototransistor FPT100, that detects light. If there are balls the phototransistor is covered and no light reaches the lens.
The unusual for this project is that it's SMD and the PIC is powered only by 2.5V which is within the specification for the PIC. Also the LDO is a low power variant.
A great solution i believe!
There are three "blink modes" to understand the function.
1- LED short blink every tenth second: normal mode, more than appx 30 bullits in mag
2- LED short blink 2Hz: warning mode, less then 30 bullits in mag
3- LED on: low battery
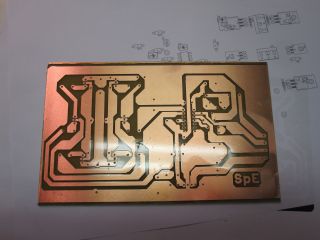
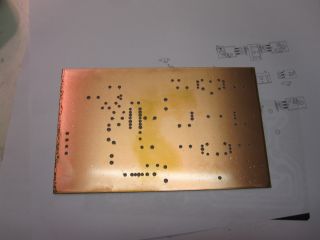
Flashing the PIC circuit onboard the small PCB.
Using the logger Wellerman PCS100 to determine battery life time.
This time is only measured for normal mode as mentioned above.
The goal was to have at least of 20h battery life time. After 91h the
logger crashed and logging stopped. at this time battery voltage was
around 2,74V and i consider the battery drained at 2.54V. With this i
believe the total lifetime to be around 110-130h. Well above the
prediction!
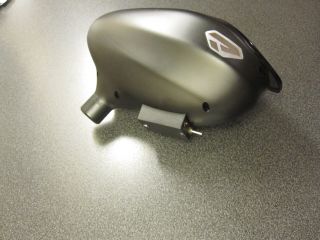
The complete PCB with the FPT100 phototransistor next to the housing.
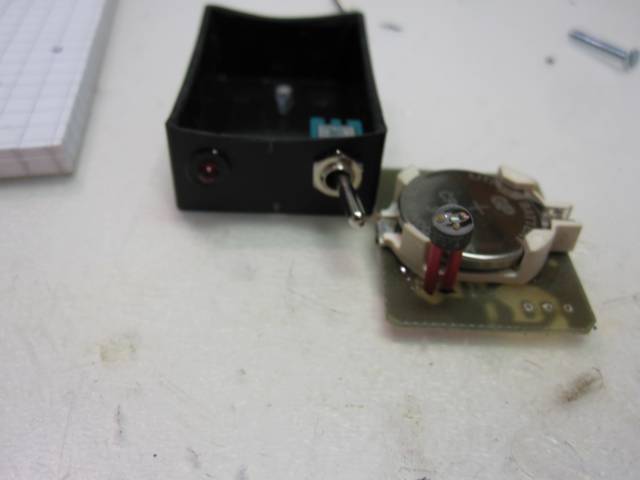
The small metal part is used to fix the housing to mag.

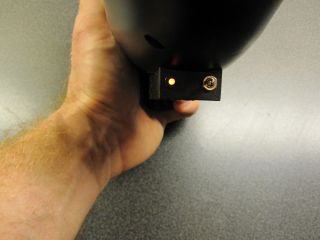
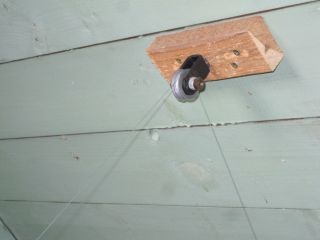
Inside the mag, where you can see the FPT100 lens next to the metal part.

Took some time to get it fitted well.
With no balls in the mag the circuit is triggered and the LED is blinking.
The complete marker with mag and level sensor mounted. Sweet!!

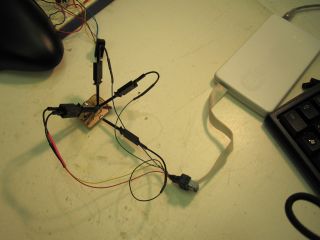
2013-10-24 US to EU converter
Unfortunatly there is not much i'm allowed to reveal regarding this project
My task in this project was to only write the SW for a PIC16F630 and to give design input by a example schematics.
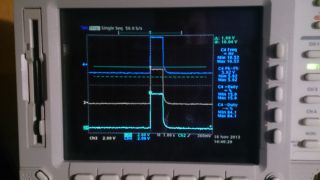
Reverse engineering with the help of Tektronix TDS754 scope

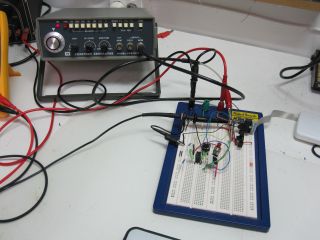
Test setup
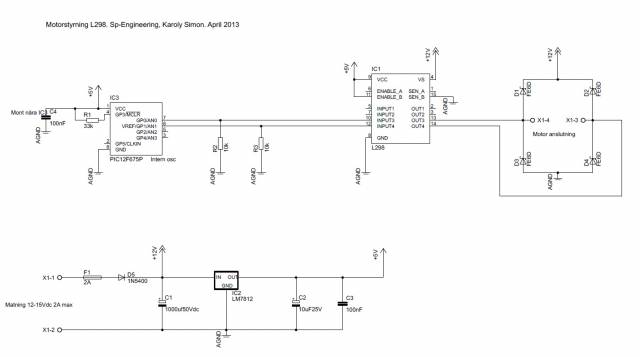
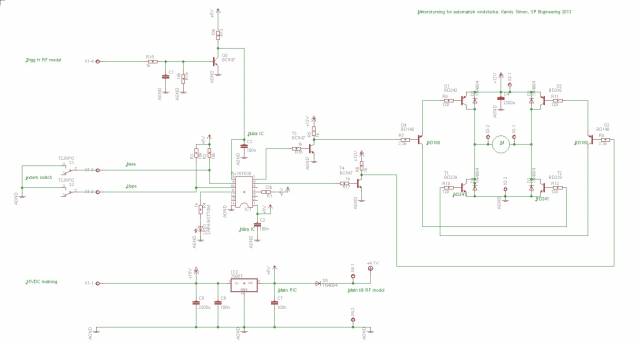
2013-04-16 Additional documentation of motordriver from 2011
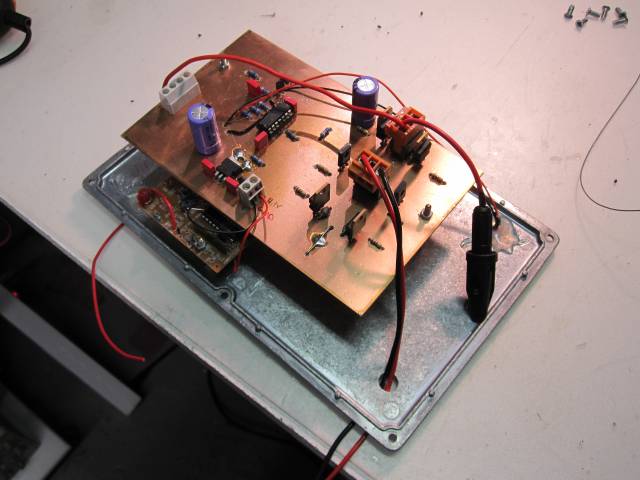
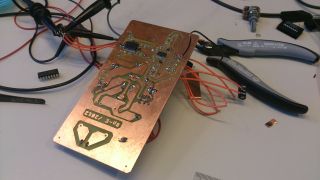
In 2011 i built a small motor driver prototype. Now i got a request for full documentation of the prototype. Unfortunatly i had no schematics or any other info saved. By sending the circuit back to me i could see what and how things were connected. Nowdays i'm very carefull with documenting every design.
Schematic...
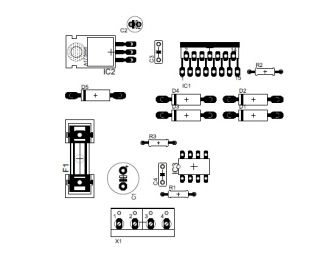
Component layout...
2013-04-07 Remote controlled hatch opener
I have a hatch up to the attic that i wanted to design a remote controlled opener for. The project below is the second and now fully working version. The first version hade major issues with false triggering when i turned on different lamps in the house and not only triggering on the remote controll.
Click here to see how it works!!!
The pic below is the fully cased controll unit and the small 12Vdc motor with gearbox. I use fishing wire to elevate the hatch, its durable and has low friction.

I use the electronic from a wireless doorbell for the RF trigger module. This is simple, cheap and reliable. The doorbell circuit is the smallest pba in the picture below.
PIC 16f630 is used as microcontroller and a regular H bridge is driver for the motor. I use a programmer and software from Mikroelektronika to program.
To cad the PCB and draw schematics Eagle professional is used. The pcb is single sided and u might wonder why i use double sided pcb. The answer is, because this was what i had at the moment.
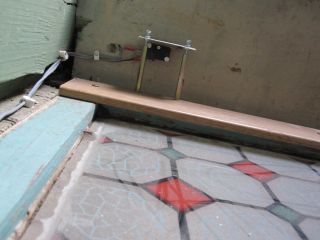
Below u can se one of the switches for the lower end position and a picture of the "mechanics" for elevating the hatch.
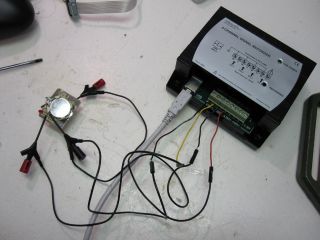
2013-02-06 Nikon Coolpix repair
The camera was dropped and due to the impact the lens focus mechanism jammed. These kind of consumer electronics are never fun to open because everything is small and fragile. Well i managed to both disassemble and assemble the camera without breaking anything.
By injecting power to the focus motor externally from a powerbox the focus mechanism was forced to move from the jammed position. Since i'm not a camera technician i cannot say if this "fix" is permanent or not but the camera works for now.

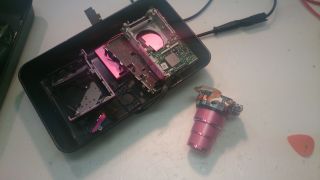
Alot of small parts, here the focus mechanism is forced to the outer position.
2013-01-01 RC modell plane "Sparky 400"
Not much to say, a small RC modellplane powered by a small Multiplex brushless motor and 2200mAh lipo battery. Have not been in the air yet.

2012-10-12 TPA6120 Hifi headphone amplifier
The objective was to build a hifi headphone amplifier for myself and to CAD a pcb using SMD components.

The choice for headphone driver circuit fell on the very popular circuit TPA6120 from TI. This is more or less a OP designed for Hifi. A input buffer stage is needed for the driver and for this LME49740 (also Hifi) was chosen.
The power supply is a double 12Vdc with rated current around 400mA.
In the design there are some additional filters and capacitors for reducing noise.
Both OP stages are configured with gain=1, for better schematics picture pls email me.
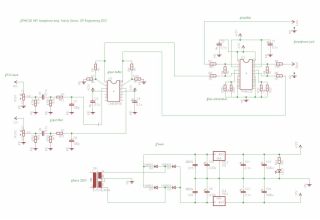
The PCB is single sided with both SMD and hole mounted components. I use Eagle both for PCB and schematics. Also due to heat dissipation there is small heatsink mounted on both driver and prestage. The prestage gets really warm even with no load. Probably due to it's hifi properties.


So what about the sound. Well it sounds damn good. The sound is very powerfull, dynamic and crystal clear with plenty of bass........
At the moment there is a very small 100Hz noise left to kill but that is still ongoing.
2012-04-01 Room temperature panel.
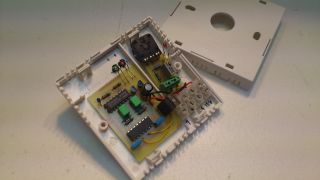
A friend asked me to build a room temperature panel for his heating system. Originally there is a simple DIY schematics with a RTC resistor and a potentiometer that sets the desired temperature in the room.
To this i added a window comparator circuit with LM324. The purpose for this was to be able to see if the set temperature is equal to the actuall in the room. The output fom the window comparator was connected to a TC4081 logical circuit which activated red or green LED. If red was on, actuall and desired temperature differed. If green was on the actuall and desired temperature were equall.

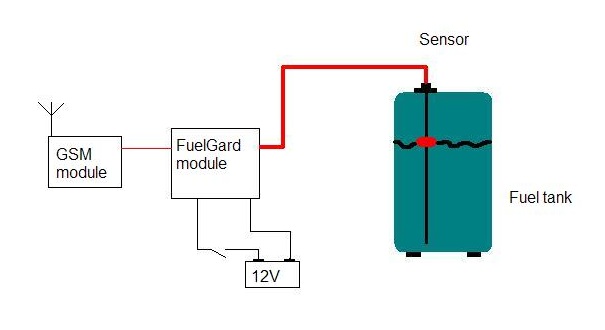
2012-02-20 Fuel Gard.
The circuit is used to monitor a fuel tank. If a certain amount fuel dissapears the circuit will activate a GSM alarm. It's designed to be universal and can be used together with most GSM alarms on the market. It can also be used with most of the common fuel sensors. Unfortunatly i can't describe more how the circuit works because it's confidential.
Only 1,5 weeks after it was installed two people were arrested for diesel theft.
So i guess it work :)
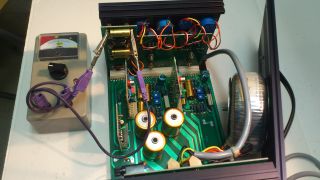
2012-01-20--Powerbox 3000 repair
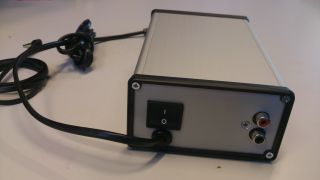
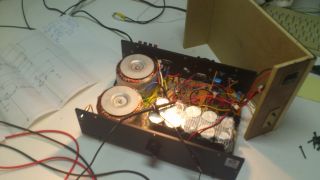
I recieved an older Powerbox 3000 that wasn't working well. When i loaded the output with the maximum allowed current (2A), it had a terrible voltage ripple. The picture below show the actual output ripple was around 5V.
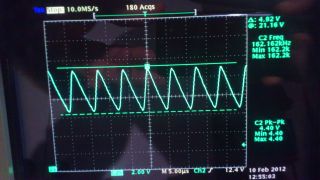
Opening the case revealed that all of the electrolytic capacitors were really old and probably dry. Using my homemade ESR meter showed that basically all capacitors were bad with ESR values at almost 10ohm.
It should be 1-2ohms for a standard "low quality" cap!
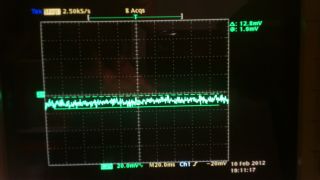
After changing the bad capacitors the output ripple was much better at 2A load, around 13mV.
2011-10-17--The Black Box
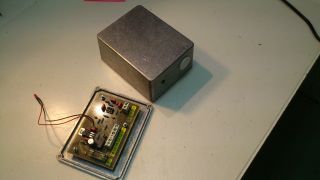
A car used on a race track for towing away crashed cars needed to be equipped with additional flash light strobes and other light equipment for safety. The signal to enable the extra light equipment were taken from the hazard warning lights.
The signal from the hazard warning lights are pulsing, but the extra ligth equipment needed continuously 12Vdc. To solve this i built a simple relay card that outputs 12Vdc as long as the warning light is switching. A capacitor is charged and sources the relay with power thru a transistor every time the pulse is low. If the hazard warning lights are turned off the relay releases after
3-4sec and the extra light equipment shuts off.
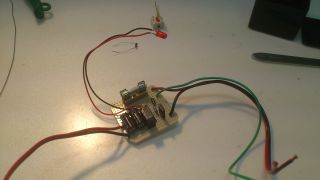
Inside the "black box"

Fully working circuit, here the output gives 12Vdc and the capacitor gives power to relay coil.
2011-09-17--Homemade watchwinder
My father owns an old automatic watch from the 1960's that he often uses. If the watch is not used for more than one day it stops and needs to be set again. I built this watchwinder for him so the watch always runs as it should.
It's based on a PIC12f675 and a simple H-bridge made by old BD139/140 transistors to reverse motor polarity. The PIC is probably overkill for this project but they are so cheap and easy to use.
The box is built of plywood which has been coloured brown and then clear coated for the "right" finish. For test purpose i use my cheap Casio G shock watch.
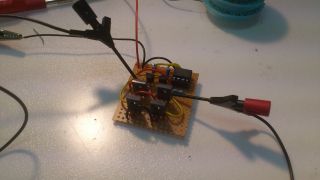 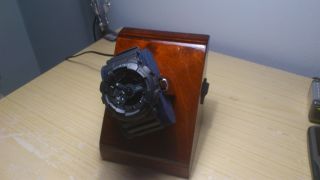
Circuit Complete winder
Click here to see the winder in action
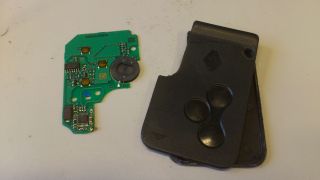
2011--Renault Keycard
The electronic Keycard used in Renault cars are very badly designed and are easily broken. I have recieved several cards with different errors.
The most common are issues with battery connectors, button keys and the coil used for RFid.
The card in the picture below had both issus with button keys and a broken battery connector. The most difficult when repairing this keycards is to actually open the palstic case without destroying it
(to much).
2011--"Silent" audio amplifier.
Many years ago I built an 2,1 amplifier that I still use sometimes. It was rated 2x15Wrms and 100Wrms for subwoofer. I use this amp in my gym.
Last time i started it the subwoofer was silent. The amp is NOT service friendly and my schematics were really bad and missing a lot. It was hard to follow the signalpath due to bad documentation. Finally I revealed that a OP-circuit which was part of the subwoofer filter was dead. Changing this fixed the issue.
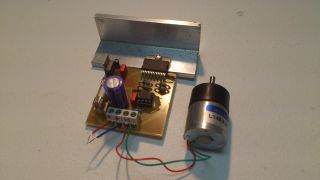
2011--Electric motor controller.
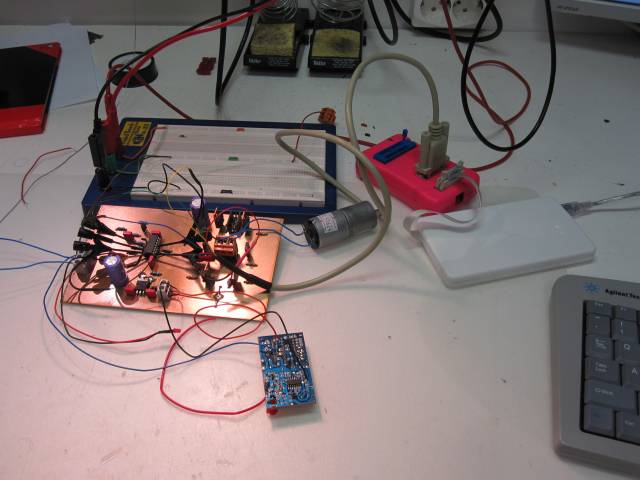
The assigment was to build a motor driver that shifted the rotation in specific sequence. It was specified for 12V and 2A. The small motor in the picture was only for testing and not the actual motor used later in the prototype.
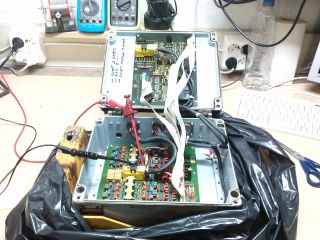
2010--Troubleshooting a motion controller.
A large construction machine was impossible to steer. A techincian identifed the controller box as faulty. It had been water damaged. The box contained two PCB's, one with mainly power electronic and one with microcontrollers. My focus was to try to refurbish the power controller card. There were several damaged components that were exchanged.
|